The method outlined by Jeff in the official FOHDY build thread to create the electronics and battery bay has, in my opinion, one drawback. The completed compartment has a Coroplast base and cover. I don’t mind the Coroplast base, since the aerofoil is nearly flat on the bottom (just a slight dihedral). However the top of the aerofoil is an aerodynamic compound curve. It seems a bit of a shame to replace this with a flattish Coroplast cover!
So I came up with the idea of leaving the top of the airfoil curve in place, and providing access to the electronics compartment from the bottom instead. Note that you can only do this if you intend to use 3S batteries – there simply isn’t space to fit 4S batteries and retain the aerofoil.
I did this as follows:-
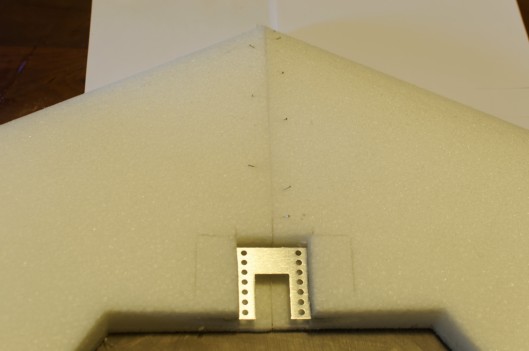
1. Cut out a block of foam large enough for the electronics compartment plus a 5-10mm “lip” on all sides (I used 10mm lip front and back and 5mm on the sides). This part is the same as Jeff’s video.
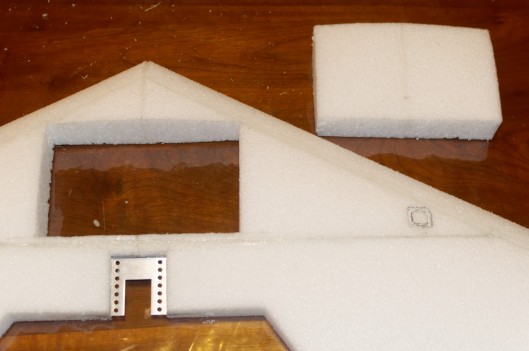
Block cut out of the Airframe
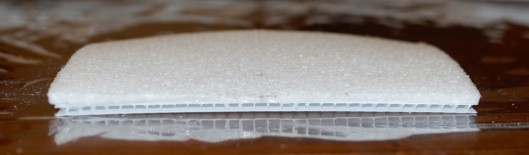
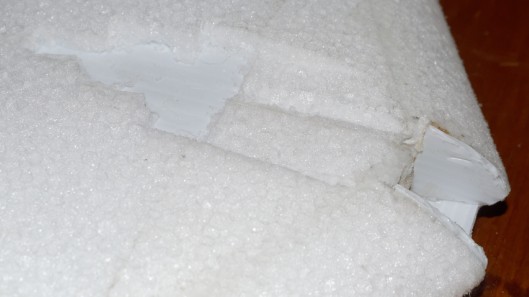
2. Cut a very thin slice off the top of the block containing the upper surface aerofoil. This is tricky because the layer has to be very thin in order to leave sufficent space inside the compartment for the battery. My slice was only bout 1mm (0.04″) thick at the thinnest point. The way I did it was to mark around all four sides of the section that I wanted to cut off, and then cut from all four sides with a sharp long bladed craft knife. Don’t try to remove the aerofoil until you are sure that it has been entirely cut through, as it will tear if there are any uncut pieces holding the aerofoil on to the main foam block.

The sliver of aerofoil (right) cut from the min block (left)
3. Cut a piece of thick (4mm) Coroplast the same shape as the thin section of aerofoil. Check that the Coroplast fits snugly into the upper opening of the cutout in the FOHDY. If it is tight, then trim the edges until it goes in without much difficulty.
4. Sand the top surface of the coroplast and lightly score it with a knife.
5. Coat the top of the Coroplast and the bottom of the aerofoil section with a thin coat of Goop/Shoe Goo. Be very careful not to damage the aerofoil. Leave the glue to partially cure for 2 minutes.
6. Carefully align the aerofoil section with the Coroplast (ensure that the Coroplast is the correct way round to snugly fit into the airframe). Press the aerofoil section gently onto the Coroplast. If it’s not sticking on the sides then add a little more Goop around the edges and gently rub it in between the Coroplast and the aerofoil.
7. Turn the assembly over (aerofoil down) and lay it onto the top wing beds in roughly the position where that section of the aerofoil goes. Add a little weight on top of the Coroplast (a book or two is plenty) to hold it against the aerofoil section while the glue dries. Leave it to dry for an hour or so.
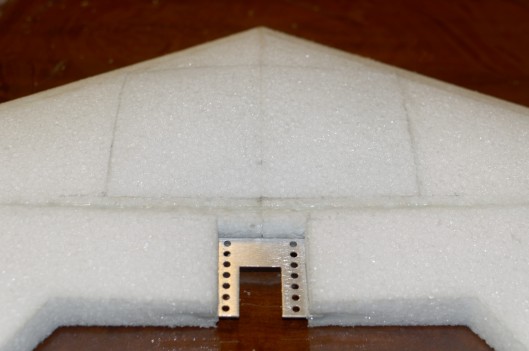
The Coroplast/Aerofoil Assembly ready to be fitted into the Airframe
8. Smear glue around the edges of the Coroplast/Aerofoil assembly and around the inside of the hole in the airframe where it fits. Push it gently into place, working from both the top and the bottom of the wing so you can align it on all sides. Wipe away any excess glue with a damp cloth. Once you are satisfied with the positioning, place it with the aerofoil side down on the upper wing beds and leave it to dry overnight.
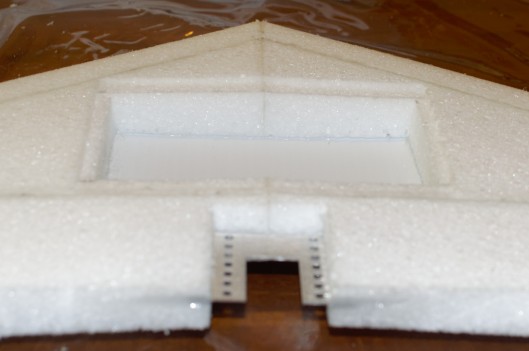
Top Aerofoil Surface retains its shape after refitting the Coroplast/Aerofoil Assembly
9. Cut the sides off the main block, trim them to height and fit them on under the Coroplast to provide a “ledge” for the rear hatch to close against, as well as to provide structural support for the Coroplast/Aerofoil assembly. I cut off material on the side that will be attached to the Coroplast/Aerofoil assembly in order to retain the “arch” shape of the underside aerofoil. I glued the sides to the EPP foam of the airframe with Shoo Goo but used hot glue to glue the top of the sides to the Coroplast since I think hot glue will work better with an impermeable thermoplastic like Coroplast. Wipe of any excess glue from the inside of the compartment with a damp cloth and the gently partially insert the remains of the main block, to press the sides against the airframe while the Goop/Shoe Goo dries (it won’t go all the way in due to the additional thickness of the Coroplast).
Bottom of the bay, with ledges for the cover
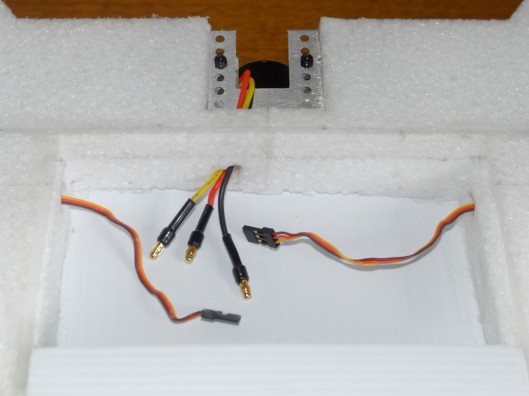
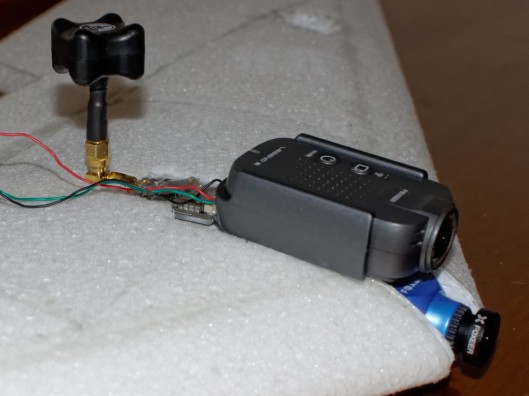
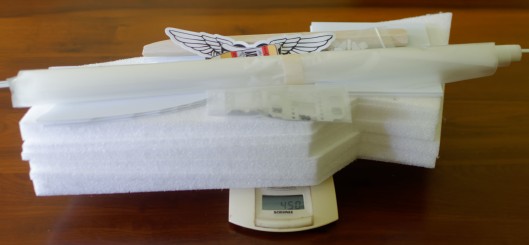
The finished bay is about 25mm deep. Mine is 160mm wide, sufficient to fit a 5000 mAh 3S battery. It is 85mm from front to back to allow space for the ESC, RC receiver and possibly a flight controller to fit behind the battery.
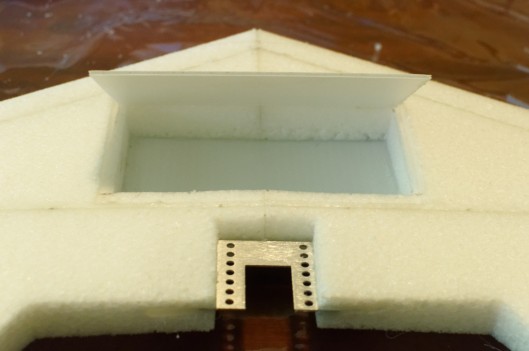
The finished bay, with hinged cover on the bottom of the wing
Postscript
Note that some autopilots, such as the Eagletree Vector and Pitlab autopilot do not allow you to change their orientation, and so would have to be fitted upside-down in this bay in order to be right side up with respect to the airframe. Other autopilots, including all those that run the open source Ardupilot and PX4 software, do allow rotation so this would not be an issue.
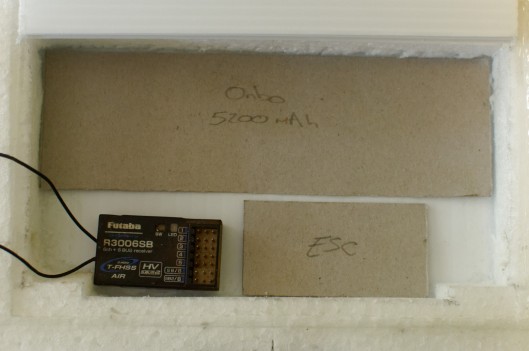
Also, make sure that you can get a battery that fits in the available space. I was planning to use an Onbo 5200mAh 3S 25C battery, but when I received the battery I discovered that the dimensions on the Onbo website were incorrect and the battery didn’t fit! Now I’ve discovered that many of the large 3S batteries are over 25mm tall, which is the height of the battery bay. Some high capacity batteries that I’ve found that should fit (although I haven’t actually tested them) are:-
- Zop Power 5000mAh 3S 60C (155 x 48 x 25mm, 404g)
- Turnigy 5000mAh 3S 20C (143 x 51 x 23mm, 360g)
- HRB 5000mAh 3S 50C (155 x 48 x 25mm, 404g)
- Onbo 4800mAh 3S 35C (138 x 44 x 25mm, 356g but confirm the dimensions!)
- Zippy Compact 5000mAh 3S 25C (162 x 46 x 21 mm, 354g)
- Bonka 4500 3S 35C (156 x 45 x 24 mm, 336g)
- Multistar High Capacity 5200mAh 3S 10C (142 x 49 x 22 mm, 331g) – but the C rating is cutting it a bit fine….
Interestingly, not only are the HRB and Zop Power dimensions and weight identical, but the warnings for both include the identical text:
“Don’t put it beside the high temperature condition.
Don’t throw it into fire.
Don’t throw it into water.”
I’m guessing that may be more than just a coincidence….
 Looks good to me! Although the predicted “mixed flight time” is only 14.8 minutes, the predicted endurance at a steady 60 kph is 45 minutes, giving a range of 45 km although I’m a bit wary of the eCalc endurance and range figures.